Let's Roll! Flower Frame
Posted by Jana on 14th Jul 2014
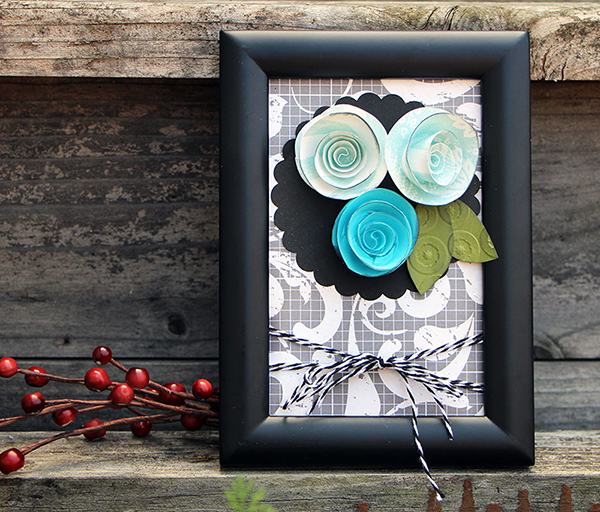
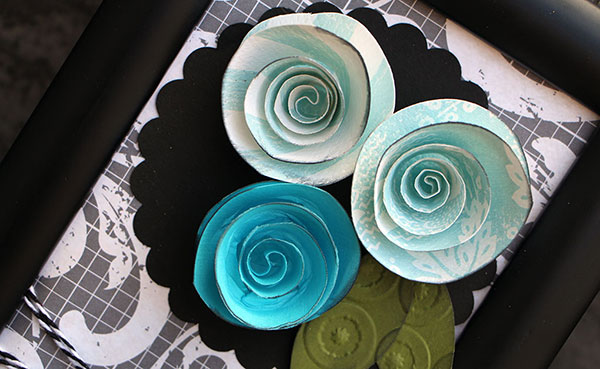
I love flowers! My favorite project would not be complete without some flower accents. I especially love how easy it is to turn a circle into a flower with the ease of a petal roller.
Today I decided to create a cute frame with rolled flower accents. Now you can make one too!
To make the rolled flowers:
- Cut 3 circles (3 inches). I used a punch but you can also use a die cut or cricut cartridge to cut your circle.
- Using a pair of scissors, cut a spiral pattern from the outside of the circle to the middle, leaving a small circle in the center (that is where your adhesive will go). You can use a pencil to trace your spiral if you desire.
- Take your petal roller and hook the tail (where you started the cut) and loosely twirl until you reach the center. Hint: If you roll loosely you will have a larger flower; if you roll tightly you will have a smaller flower. Carefully pull the petal roller free of the paper. You will have a rolled flower.
- Using your favorite adhesive, place a small amount on the inner circle and press (with finger) your flower to the center until the flower stays in place.
Hint: If you want to flatten your flowers you can turn them upside down and press with the palm of you hand. You can also roll them through your favorite embossing machine.
To make the frame:
- Cut a pattern piece of paper to 4x6
- Cut a 4 inch scallop and adhere toward the top of your 4x6 paper
- Adhere your desired amount of rolled flowers in the center of your scallop
- Cut 2 leaves (emboss if desired) and adhere as desired under a flower
- Use twine or ribbon and wrap along the bottom of the 4x6 pattern paper (we used twine)
- Use a 4x6 frame and remove glass. Take the 4x6 accented paper and place in frame and secure with the frames backing
Rolled flowers are great for cards, scrapbook layouts, home decor items and even jewelry and headbands. The possibilities are endless!
Supplies
|